

Hello.
I hope you all had lovely New Year celebrations.
One of my favorite breakfast foods is Cinnamon Rolls; they are so warm, sweet, and filling. I love how they just taste…homey, cozy, and satisfying. Maybe that is because growing up, cinnamon rolls were always a special treat; we only had them on birthdays and other special occasions…like New Year’s Day. It usually takes a couple of hours to make some really delicious cinnamon rolls at home; however, the recipe I am about to share with you literally takes only one hour. Can you believe that?! One hour for a dozen delicious cinnamon rolls! Although I still only have them on special occasions, one hour is a lot better than 2 or 3, regardless of the occasion, right?
This is a really easy, straightforward, but delicious recipe; let’s get started!
Here is the recipe:

So, you start out by mixing the dough ingredients together in a mixer. I would definitely recommend using a stand mixer with a dough hook for this step, if you can, because we are going to eventually get a pretty thick dough. This is what it looks like before you add the remaining 2 ¾ cups of flour:

Next, you need to add the rest of the flour and mix it until it becomes a dough, at which time you take the dough out and knead it on a floured surface for about 5 minutes:

After kneading for 5 minutes, the dough needs to be allowed to rise for 15 minutes. I usually spray the mixing bowl with cooking spray, put the dough back inside, and then cover it with a warm, damp towel.
While the dough is rising, I get the ingredients ready for the inside of the rolls. Although the recipe calls for 2 tablespoons of butter, I find that lots of times I run out, so I always make sure I have plenty of melted butter to go around by melting 4 tablespoons instead. I usually have more than enough, but I think it is better to be safe than sorry. If you think this is wasteful (it is), then just go with what the recipe says, and add more later on if needed. I usually melt the butter in a glass bowl while the oven is heating up (I don’t feel comfortable melting butter in the microwave…it always explodes!).
While the butter is melting, you can make the cinnamon sugar. You can buy cinnamon sugar at the store, but I just make my own; it is more economical, in my opinion. Also, you can experiment with the ratio, and choose which you like the most. Just like for the butter, I prefer to have more than enough, because it is a pain when you’re adding it to the dough and you run out! I hate having to go back and make more. I make about ¾ cup of cinnamon sugar with the following ratio: 1 Tbs. cinnamon : ¼ cup sugar. So, I add 3 tablespoons of cinnamon to ¾ cup of sugar. I think lots of people find this to be too cinnamon-y, but it is great for me. I like that the flavor is very evident as you bite into that warm roll. If it is too much for you, you could experiment and find a ratio that works better for your tastes. Basically, I just mix that all together and set it aside.
When the dough is done rising take it out of the bowl. I just want to warn you that the dough doesn’t really rise too too much. So don’t be alarmed if it looks like it didn’t rise at all; it’s still ready to go.
Next, roll the dough out pretty thin. This is the step that really takes time and therefore, patience. The dough can be pretty elastic after kneading it for 5 minutes, so it usually takes a bit of work to roll it out. My most important advice for this part? Make the rolled out dough long and skinny! It is really important to not make it into a square or a not-so-skinny rectangle because later, when we roll the dough up, you don’t want the roll to be too too fat. If it is, the rolls will never cook all the way through and you’ll have a gooey dough in the center of your rolls! Ew.

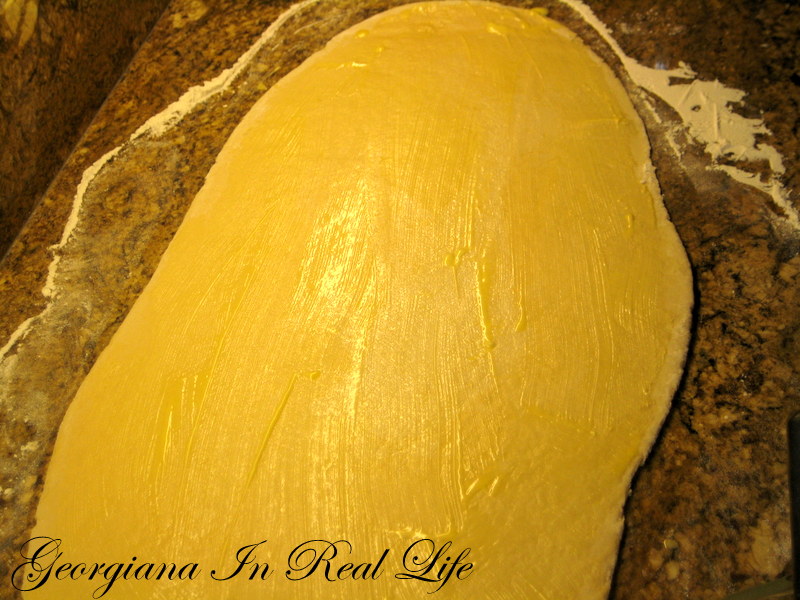
After rolling it out, fetch the melted butter and brush it on with a pastry brush.

The butter is there to hold onto the cinnamon sugar, so make sure you put the butter wherever you want the cinnamon sugar. I always make sure to brush it all the way to the edges of the dough!
Next, sprinkle the cinnamon sugar on.

I usually use a pretty heavy hand while applying this to the dough; you can’t have too much, in my opinion! Even so, I almost always have some left over, but unlike the butter, it isn’t wasteful to make extra, because you can always store it and save it for later! I add the extra to a cinnamon sugar jar so I can use it on toast if I want, or later on another batch of cinnamon rolls; it is non-perishable, so don’t worry about holding onto it for a while!

After you spread the cinnamon sugar on the dough to your liking, you’ll need to roll up the dough. I usually like to do it pretty tight so the cinnamon sugar doesn’t fall out the sides; I just don’t think cinnamon rolls are very good if they haven’t any filling in some spots! Make sure you roll the dough up the long way so the cinnamon roll won’t be so thick it can’t cook through. When you’re done, you should have a long snake of dough:

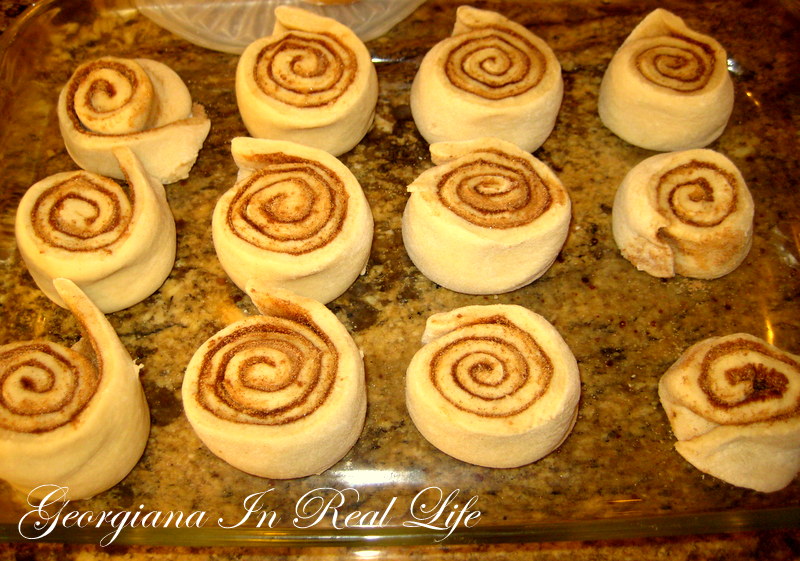
Finally, cut the snake into smaller sections. I always use a little string tool; you simply scoot the string underneath the roll and then twist it over the roll. When you pull the string across the top of the roll and pull up, it will create a nice, clean and easy cut through the dough. 
If you don’t have a string tool, you can use a sharp knife; I just don’t think it would be as easy. But try it out and tell me how it works!
After cutting the rolls, add them to a large baking dish. The pan I used is a large, 15 inch x 10 inch Pyrex pan, and it is perfect for one batch of cinnamon rolls! When you are placing the cut rolls into the pan, make sure you push down on the top a little to make them a little shorter and wider. Let them rise before placing them in the oven.
Place them into a 425° oven, and in 12 – 15 minutes, you’ll be eating your first one hour cinnamon roll! These babies are de-licious! Make sure they are slightly browned before you take them out.

While they’re in the oven, you can make a simple frosting for the top.
I like to make the frosting in a Pyrex bowl with a removable top so I can store the frosting until the cinnamon rolls are gone, without the frosting drying out.

When the cinnamon rolls come out of the oven, simply drizzle the frosting over the top (as if there isn’t enough sugar already!). You can do this in the pan (over all the cinnamon rolls), or over each individual roll once they’ve been served. I usually do it this way so everyone can add frosting to his or her own tastes…and, it keeps the pan less messy (for easier clean-up).

Well, those are my delicious one hour cinnamon rolls! If you have any questions or want to suggest any modifications to the recipe, let me know! I’d love to hear from you.

xoxo,
gigi
ps. Make sure you stop by next week when I’ll be doing a two-part series on sewing machine maintenance. I decided that I would start my new year of projects out right by cleaning up my baby and getting her ready to sew!

yum, those look delicious, I’ll have to try your recipe, it looks so simple!
Trust me; they are so, so easy! I hope you enjoy them!
Thanks so much for the recipe! I love that these only take an hour! So much quicker than previous recipes I have used and so delicious! I used your dough recipe but make them peanut butter rolls rather than cinnamon. I blogged about them and made sure to link back to your blog to get the recipe! Have a great day!
Yum! That sounds so, so good! I think I’ll have to try the peanut butter rolls, too. Who doesn’t love peanut butter?! Thanks for letting me know they worked out. :)
I just found your recipe via Lena-it looks amazing! Thanks so much for the great instructions too.
Best wishes,
Natasha in Oz
Thanks! I hope they work out well for you!
You don’t say what kind of yeast to use…does it need to be the active rise type or just regular? Also, how long do you let them rise before baking? My kids ADORE cinnamon rolls and I usually make them only 1-2x/year b/c of the time involved. Looking forward to trying these :)
Hey, Cindy. Thanks for you question! It is the active yeast you have to use. You can use the regular yeast but you have to let it soak in 1/2 cup of the water first before adding it. After you cut them, you just let them rise for 10 minutes before cooking them. They are so easy! Just remember that they don’t really rise that much, at all. I hope your kids love them!